Add your character
Show Nag which character to watch. Nag learns what happens in the game by reading that character’s log file.
1. Turn on logging in EverQuest
Nag can only read what EverQuest writes down.
- Log in to your character.
- Type
/log onin the chat box and press Enter.
You only need to do this once for each character.
No log file means no alerts. If Nag ever seems quiet, check that logging is on.
2. Go through the Setup window
The first time Nag opens, a window called Setup appears. Click Next after each step.
-
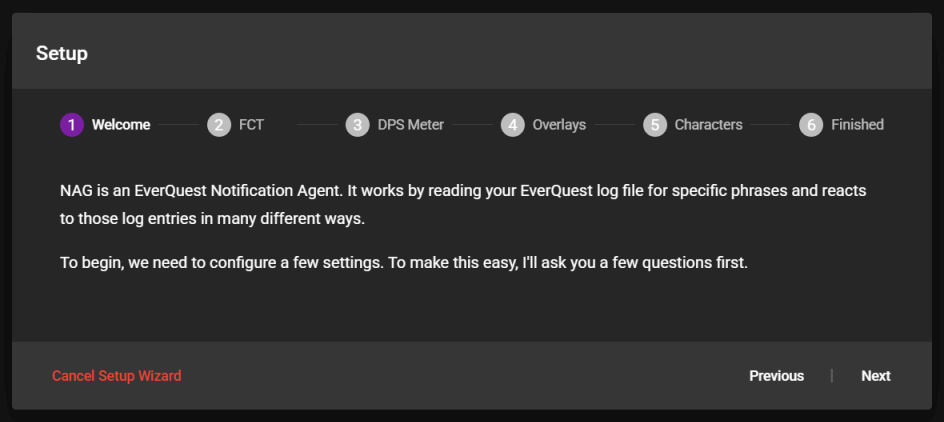
Welcome: just click Next.
-
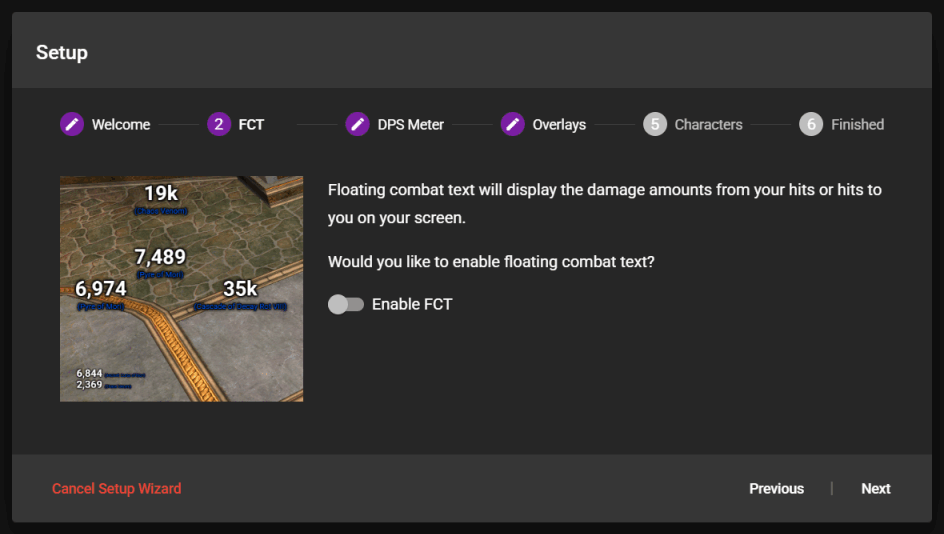
FCT: floating combat text shows your damage as numbers on screen. Leave Enable FCT off if you are not sure.
-
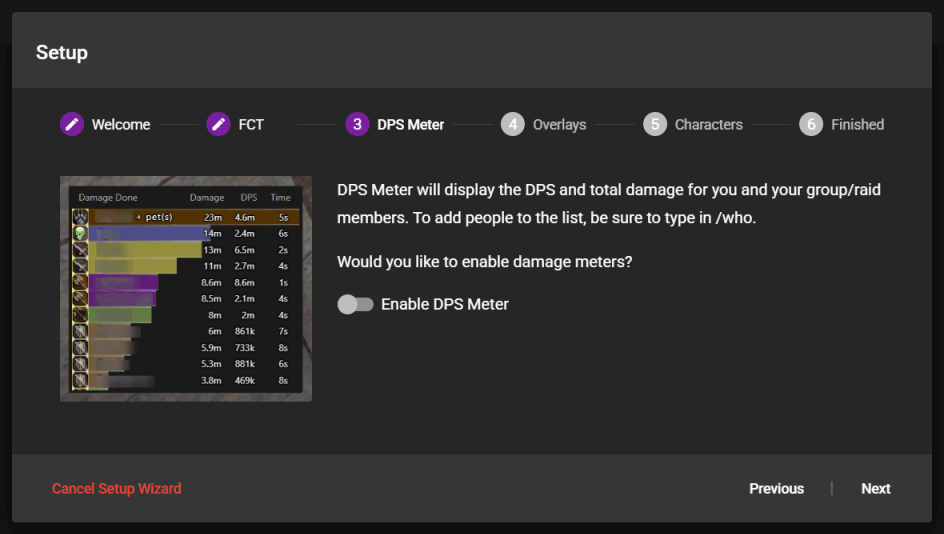
DPS Meter: shows damage for you and your group. Leave Enable DPS Meter off if you are not sure.
-
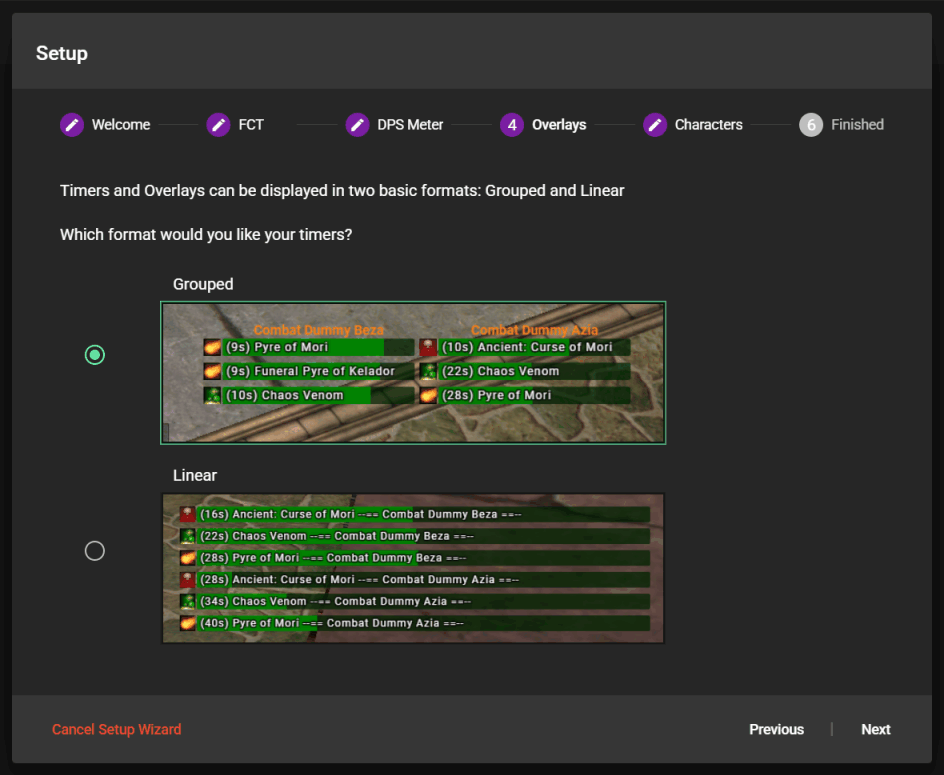
Overlays: choose Grouped or Linear for your timers, then click Next.
-
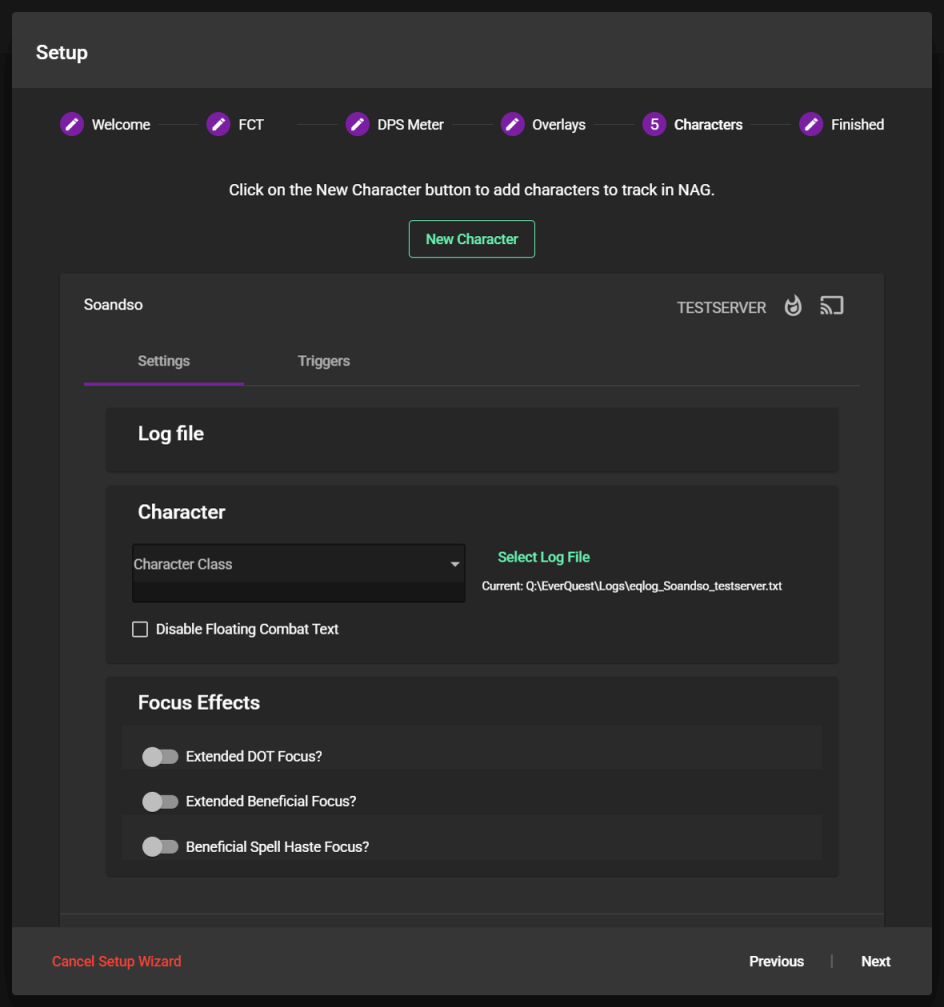
Characters: click New Character and follow the steps in “Add the character” below. Then click Next.
-
Finished: click Complete Setup!
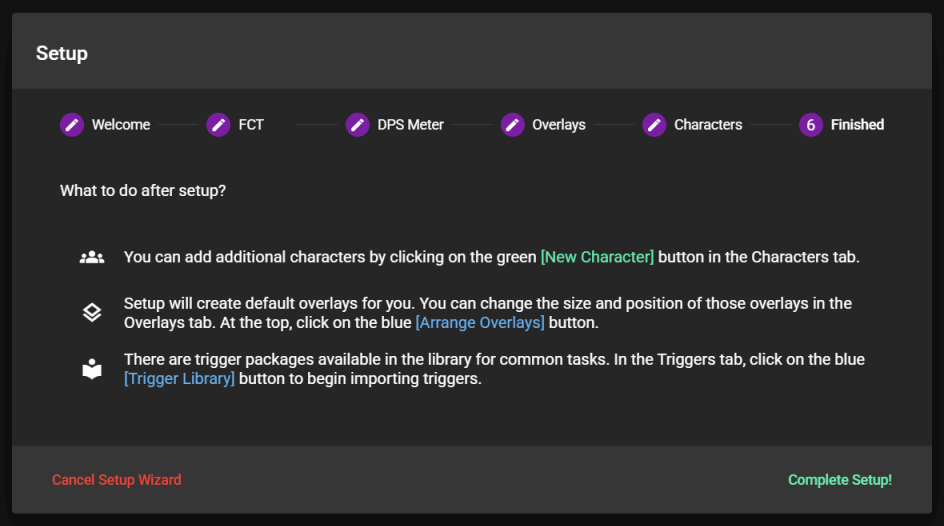
When you click Next on the Overlays step, Nag creates your overlays. An overlay is the on-screen box where timers and alerts show up. You get Detrimental Timers, Beneficial Timers and Text Notifications. If you turned on Enable FCT, you also get FCT My Damage and FCT Damage to Me.
A window called Arrange Overlays opens at the same time. You will see your new overlays on screen. Drag each one to where you want it, then click Save. Click Cancel to keep the default places. You can do this again later.
You can turn FCT on later in the Combat tab, under Floating Combat Text. If you click Cancel Setup Wizard, a green gear button appears at the top of Nag. Click it to start the Setup window again.
Not sure about Grouped or Linear? Pick Grouped.
3. Add the character
In the Setup window you have already clicked New Character. Otherwise, click the Characters tab, then New Character.
A window called New Character opens.
- Wait a moment while Nag shows Searching for EverQuest folder.
- Open the Server list and pick your server.
-
Open the Character list and pick your character. A name that says Added is already in Nag.
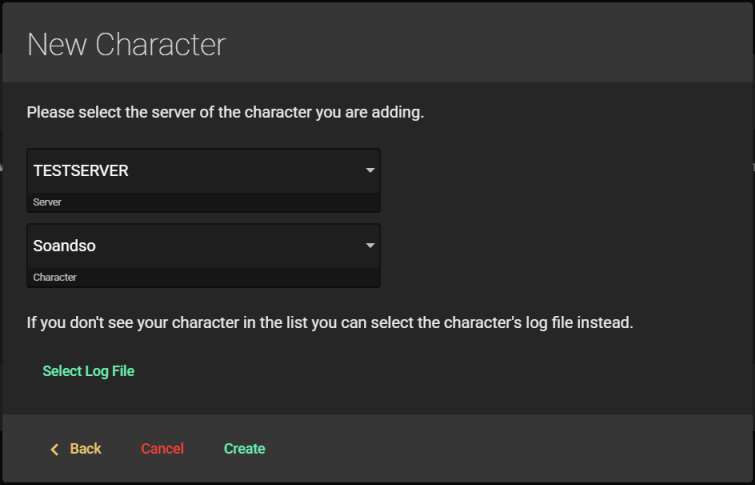
- Click Create.
You will see Character added! at the bottom of the window, and your character in the list.
If Nag cannot find your EverQuest folder
You will see Could not locate your EverQuest folder. Please select your character’s log file.
- Click Select Log File.
- Open your EverQuest folder, then the
Logsfolder. - Pick the file named like
eqlog_Soandso_testserver.txt. It starts witheqlog_, then your character, then your server. -
Check the Character Information shown: Character Name, Service, Server and Log file.
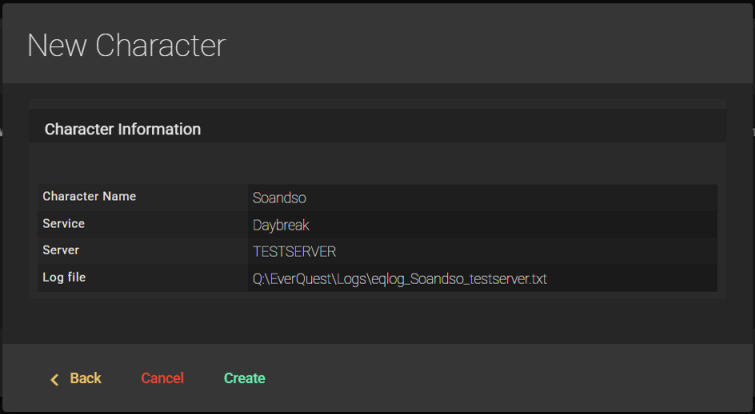
- Click Create.
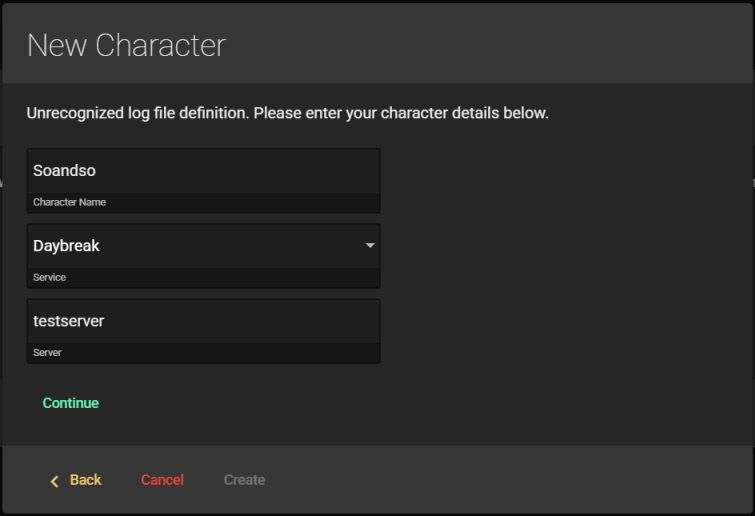
If Nag does not recognize the file name, it asks you for Character Name, Service and Server. Fill them in and click Continue, then Create. For Service, pick P1999, Daybreak, TAKP, THJ or Other.
4. Set the class
- In the Characters tab, click your character’s name. Its details open.
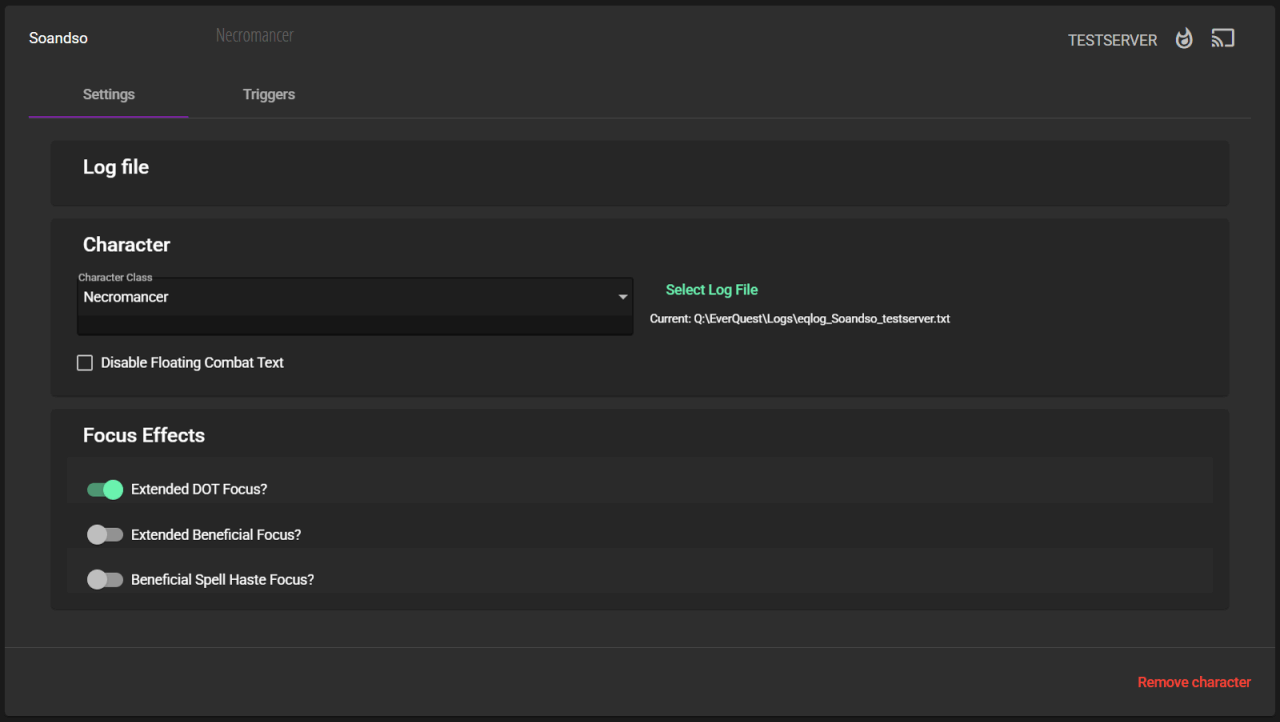
- On the Settings tab, open Character Class and pick your class.
You will see the class next to your character’s name.
Nag uses your class to work out how long your timers last. It also keeps class-only triggers quiet for other classes.
5. Set your focus effects
Focus effects are gear and abilities that make your spells last longer or cast faster. Nag counts them when it times your spells. If you have none, skip this step.
Under Focus Effects, turn on what applies to you:
- Extended DOT Focus?: type the % increase and the Level where it starts to fade.
- Extended Beneficial Focus?: type Worn, Level and AA.
- Beneficial Spell Haste Focus?: type Worn, Level, AA and Duration Limit.
Nag saves each change as you make it.